Subscription plans
A subscription plan in Crystallize is a blueprint that defines the rules and properties for how a subscription works. Plans can be reused across multiple products, ensuring consistency and reducing duplication when you offer the same billing model for different items.
For example, you could create a “Pro Monthly Plan” that applies to multiple SaaS features, or a “Quarterly Box Plan” that works across different subscription box offerings.
Creating Subscription Plans
You can create and manage subscription plans under Settings → Subscription plans.

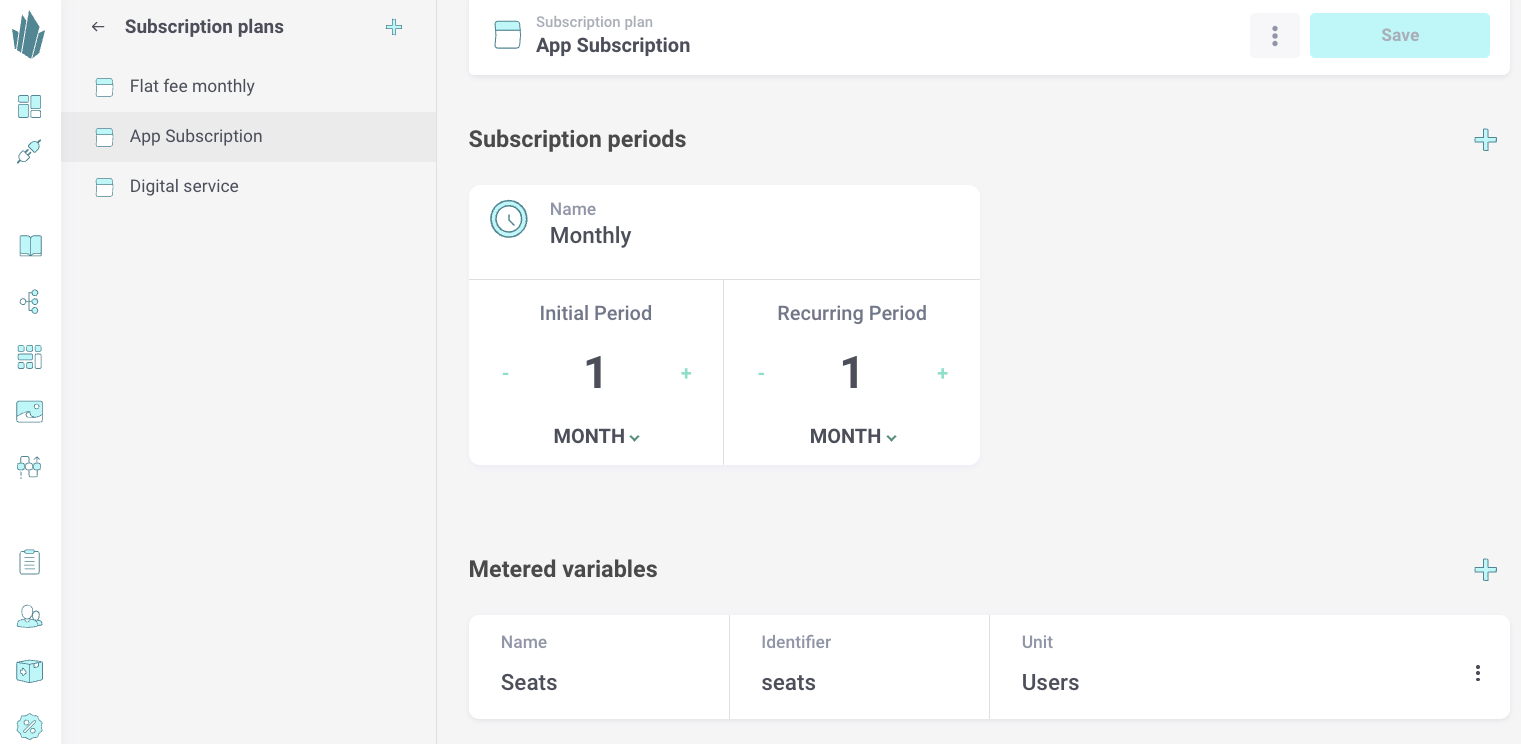
Define the lifecycle of the subscription.
Define the lifecycle of the subscription.
- Initial period (optional): Use this if you want to offer a trial, free months, or a discounted starting period.
- Recurring period (required): The ongoing billing cycle.
You can set a name for the subscription period, then configure its length using numerical values combined with time units. Supported units:
- Days
- Weeks
- Months
- Years
Example:
- Initial period: 1 month (free trial)
- Recurring period: 12 months (billed annually)
Metered variables
Metered variables allow you to define usage-based pricing models. These track measurable quantities that affect billing, such as:
- Number of users
- Amount of storage (e.g. GB)
- Bandwidth usage (e.g. TB transfer)
How to configure metered variables:
- Click the + button to add a new variable.
- Enter a Name (e.g. “Users”).
- A unique Identifier will auto-generate based on the name (you can edit this if needed).
- Specify a Unit of measurement (lowercase, no spaces for ease of coding, e.g. users, gb, requests)