Roles & Permissions
Roles in Crystallize let you control access and responsibilities across your tenant. They define what users can read, create, update, or delete. Both in the App UI and through the API.
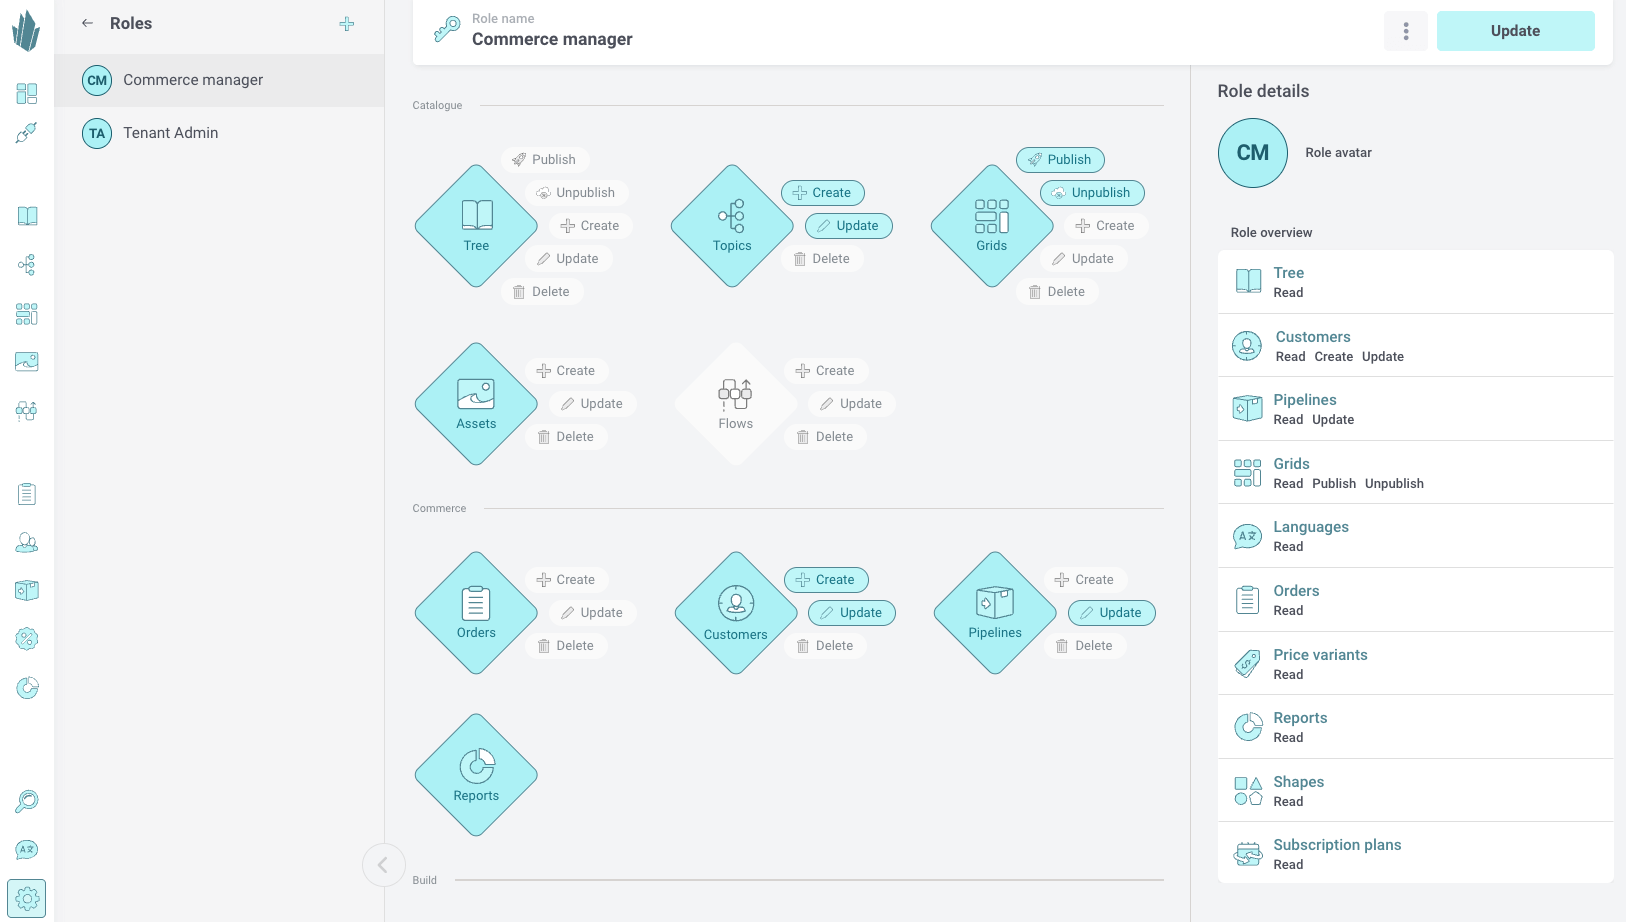
Creating a new role
- Go to Settings → Roles.
- Click Add role and give it a name, such as Commerce Manager or Content Editor.
- Define which parts of your tenant this role should have access to, including Catalogue, Commerce, and Build sections.
Each section is represented visually, allowing you to toggle permissions for specific actions like Create, Update, Publish, or Delete.
Configuring permissions
Permissions control access both in the App UI and the API.
Each entity (for example, Items, Orders, Customers) can have specific permissions:
- Read - allows viewing content.
- Create - allows adding new content or records.
- Update - allows editing existing data.
- Delete - allows removal of data.
- Publish / Unpublish - controls visibility of catalogue items.
You can grant full access quickly using the Give full access option or configure permissions individually for fine-grained control.
Conditional access
You can limit access further by adding conditions.
For the catalogue conditions can be based on language or specific items. For example, allowing a user to edit only English content or a particular product category.
To add a condition to the catalogue:
- In the role overview on the right select Tree.
- Click Add condition.
- Choose filters such as Language or Catalogue.
This enables flexible access control, ideal for larger teams managing content across regions or product domains.

Best practices
- Create separate roles for editorial, commerce, and admin responsibilities.
- Use conditional access for regional or language-specific teams.
- Review role permissions regularly to ensure proper security and access balance.
Keep exploring
UI Preferences
Some permissions in a role have their own UI Preferences, allowing you to tailor the interface experience for different teams or responsibilities. This ensures that users see the most relevant shapes, components or price variants.
Users
Users represent the people who have access to your Crystallize tenant. Each user can be assigned one role, which defines their permissions and access level across Crystallize.
You can manage users from the Users section in Settings.