Users
Users represent the people who have access to your Crystallize tenant. Each user can be assigned one role, which defines their permissions and access level across Crystallize.
You can manage users from the Users section in Settings.
Inviting users
To add new users to your tenant:
- Go to Settings → Users.
- Click Invite new user +.
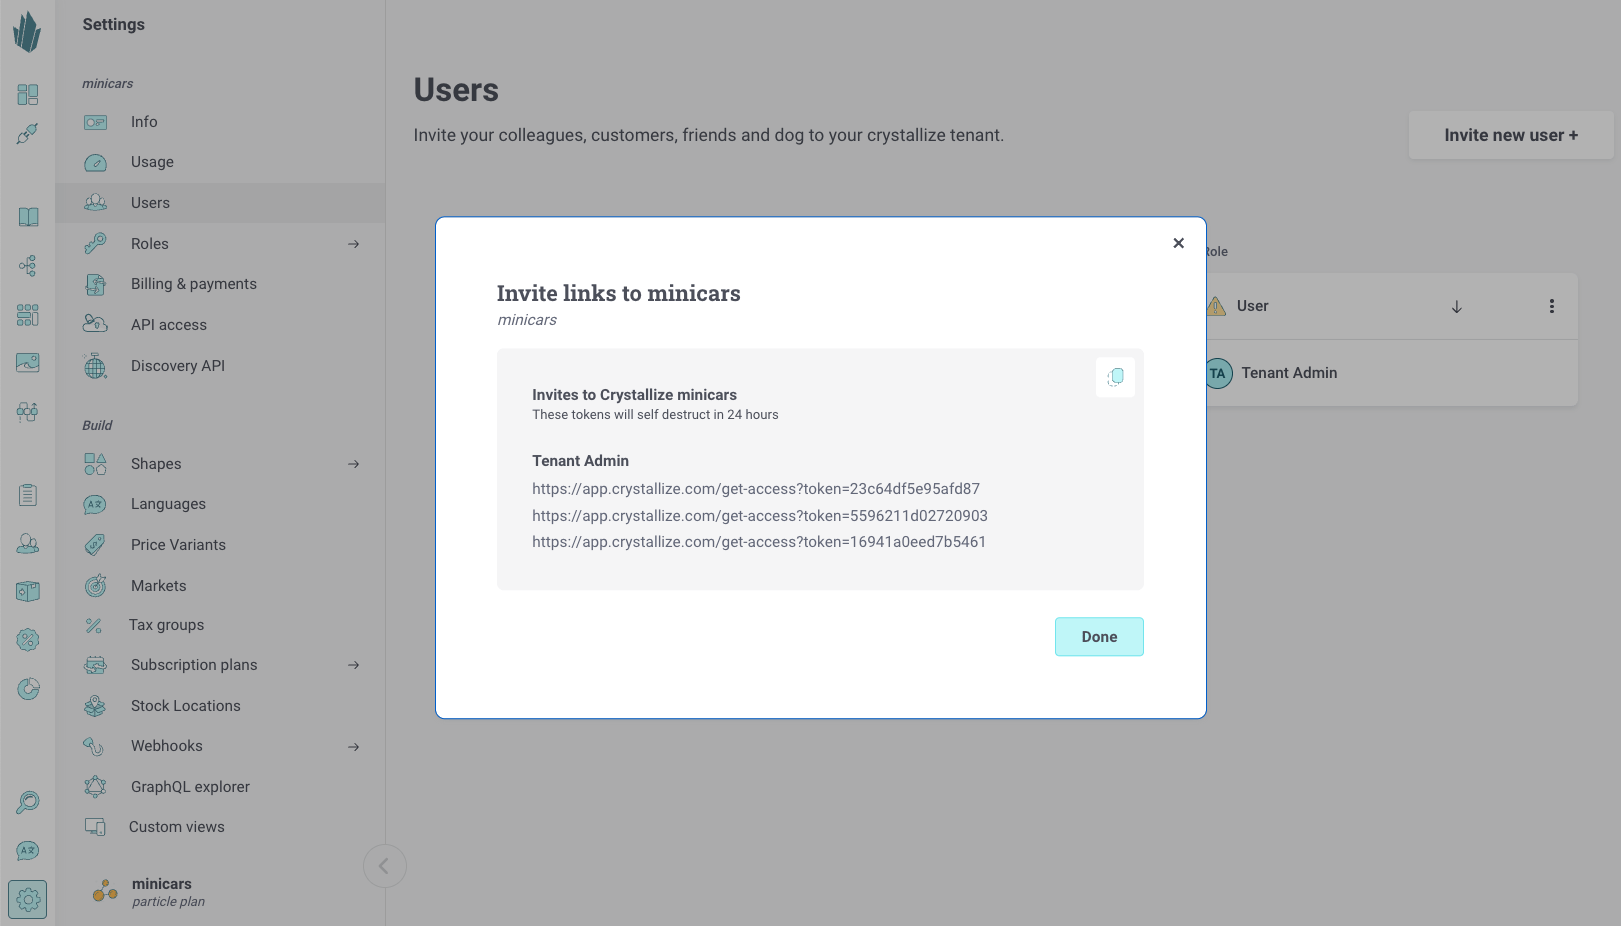
- Choose which role the invited user should have.
- Copy and share the generated invite link.
Each invite link is temporary and will self-destruct within 24 hours for security reasons. Once the user opens the link and logs in, they are automatically added to your tenant with the assigned role.
Managing user access
Existing users appear in the list within the Users view.
From here you can:
- See each user’s assigned role.
- Change their role if responsibilities shift.
- Remove users who no longer need access.
Best practices
- Assign roles based on team responsibilities to maintain clear access control.
- Regularly review active users to keep your tenant secure and up to date.