Creating and Managing Tenants
Crystallize is a multi-tenant SaaS platform. Each tenant is a self-contained environment with its own product universe and commerce engine data.
The number of tenants you can create depends on your subscription plan.
Projects on the Particle and Atom plans include a single tenant. Enterprise projects on the Crystal plan support up to three tenants by default. Typically used for production, staging, and development, with the option to add more as defined in your contract.
Creating a New Tenant
To create a tenant:
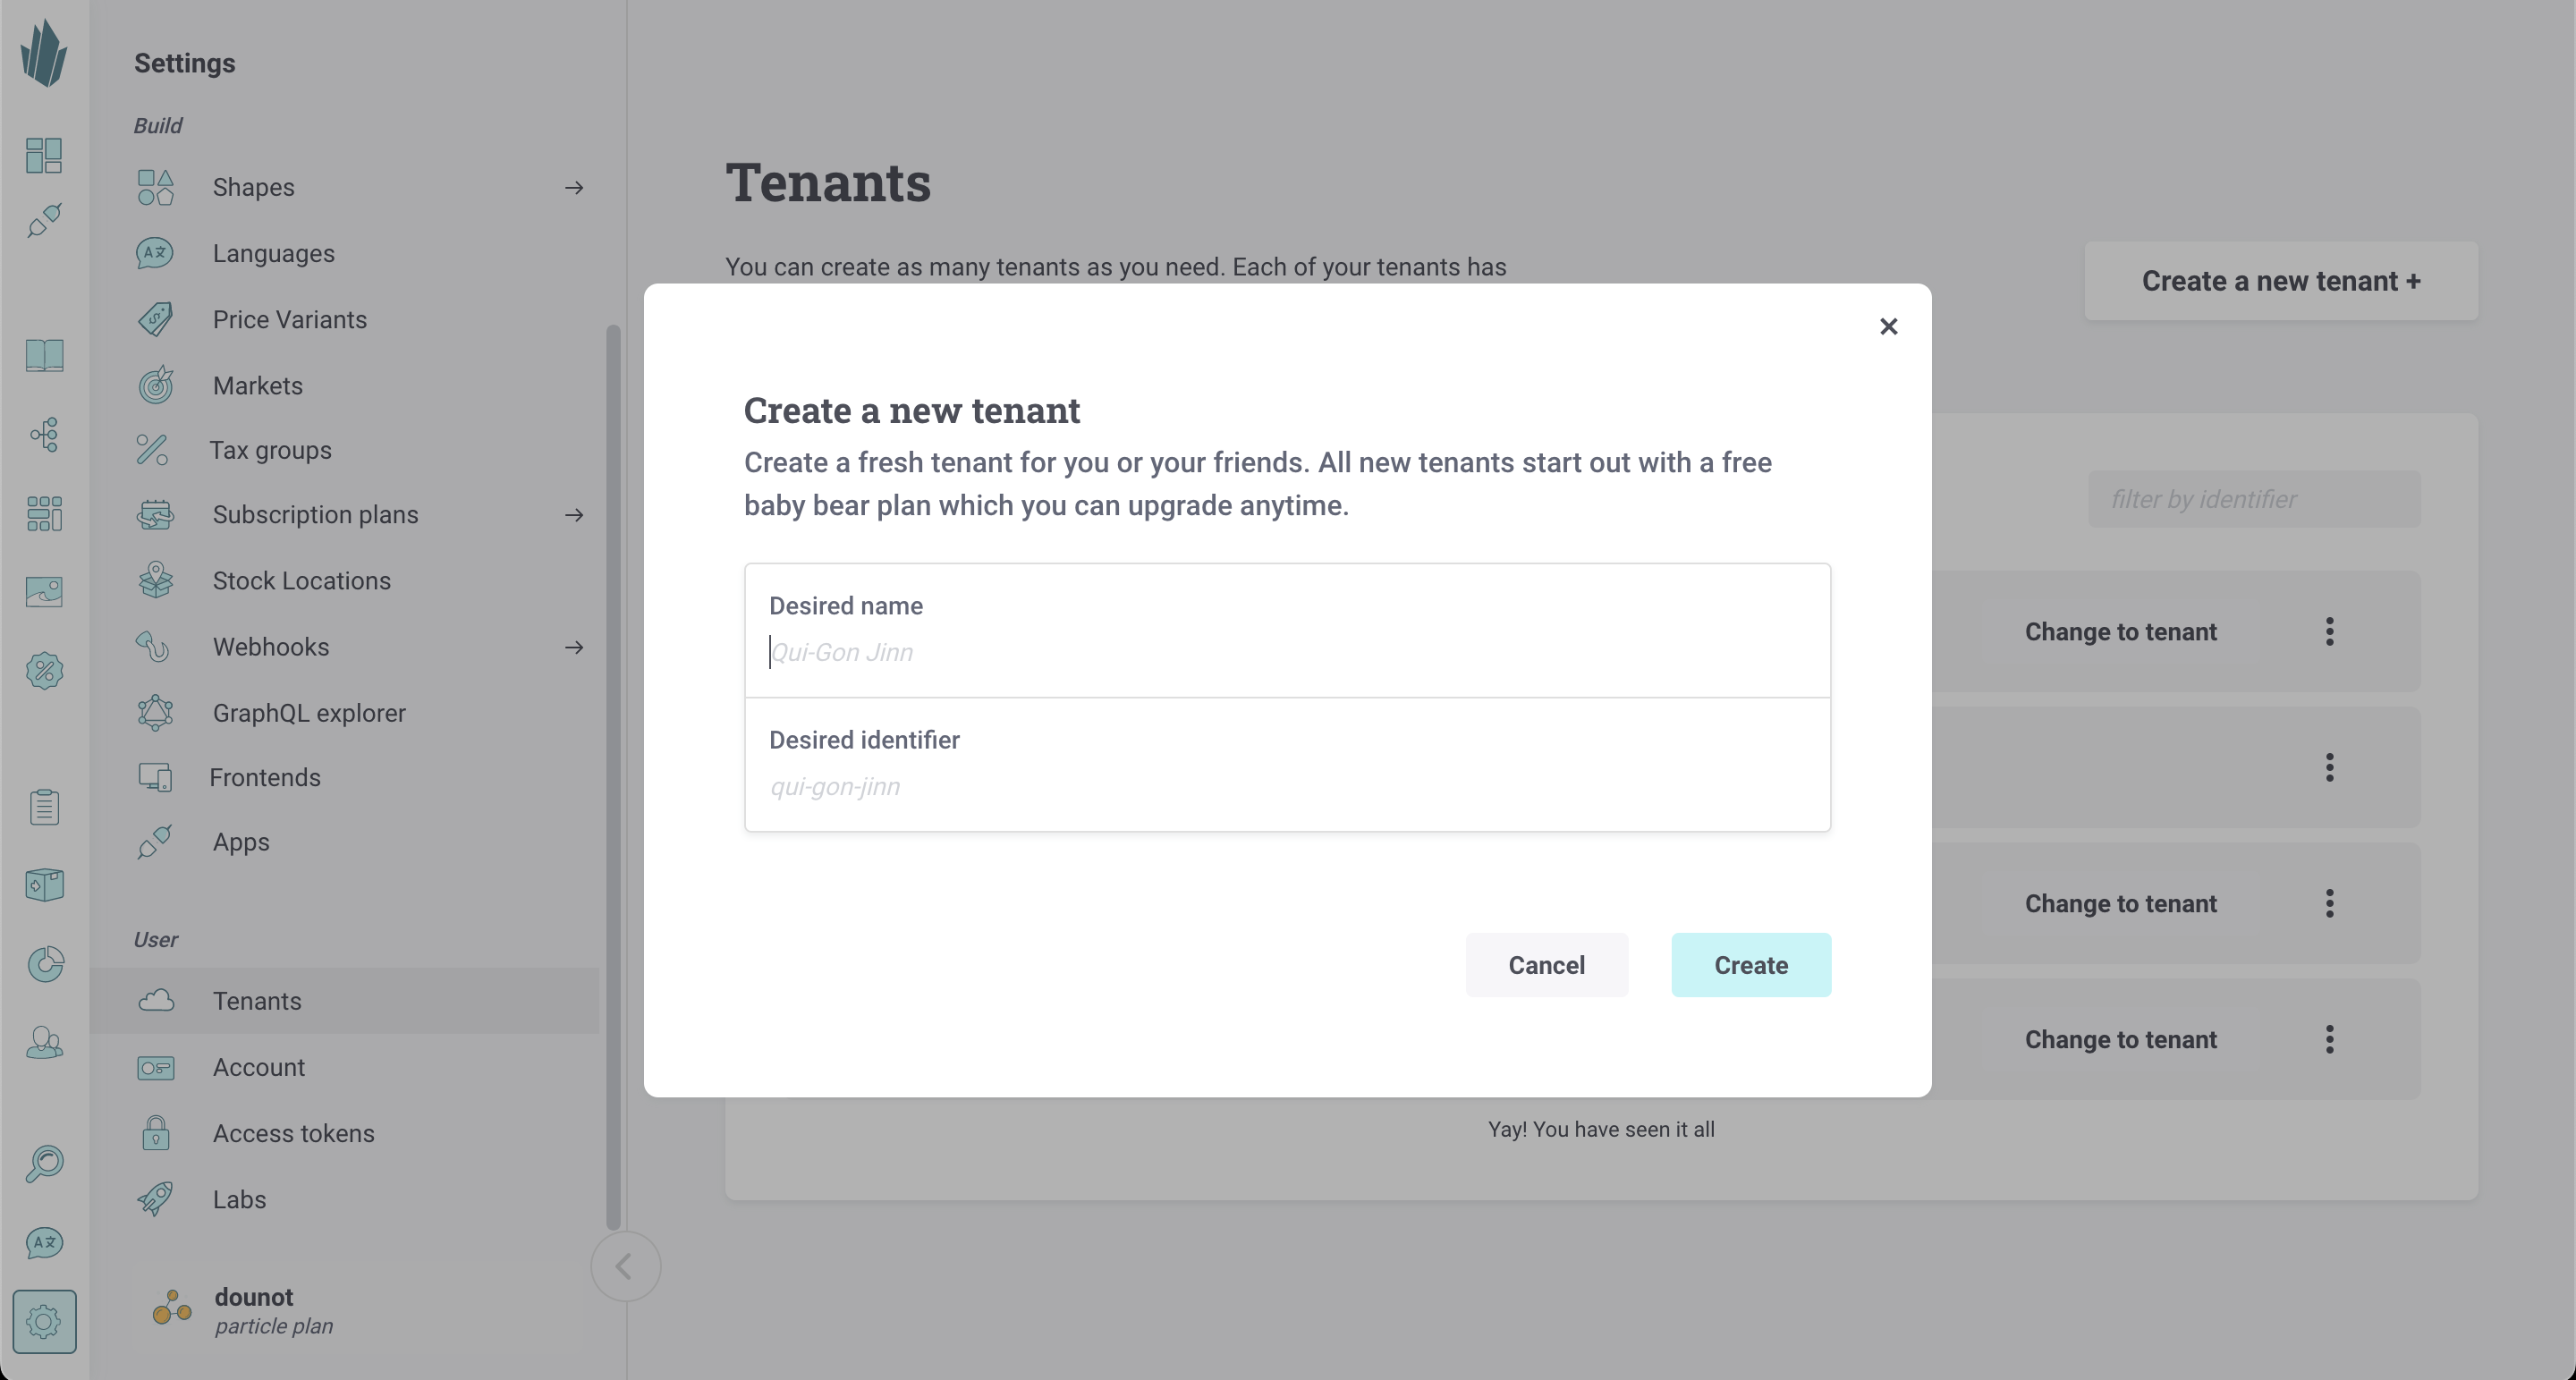
- Click the Settings icon in the left sidebar and choose Tenants.
You can also open the command palette with Ctrl / ⌘ + K and type Tenants. - Click Create a new tenant.
- Enter a name and unique identifier for your tenant.
- Click Create.
Once created, your tenant is instantly available at:
https://app.crystallize.com/@your-tenant-identifier https://app.crystallize.com/@your-tenant-identifier
Managing Tenants
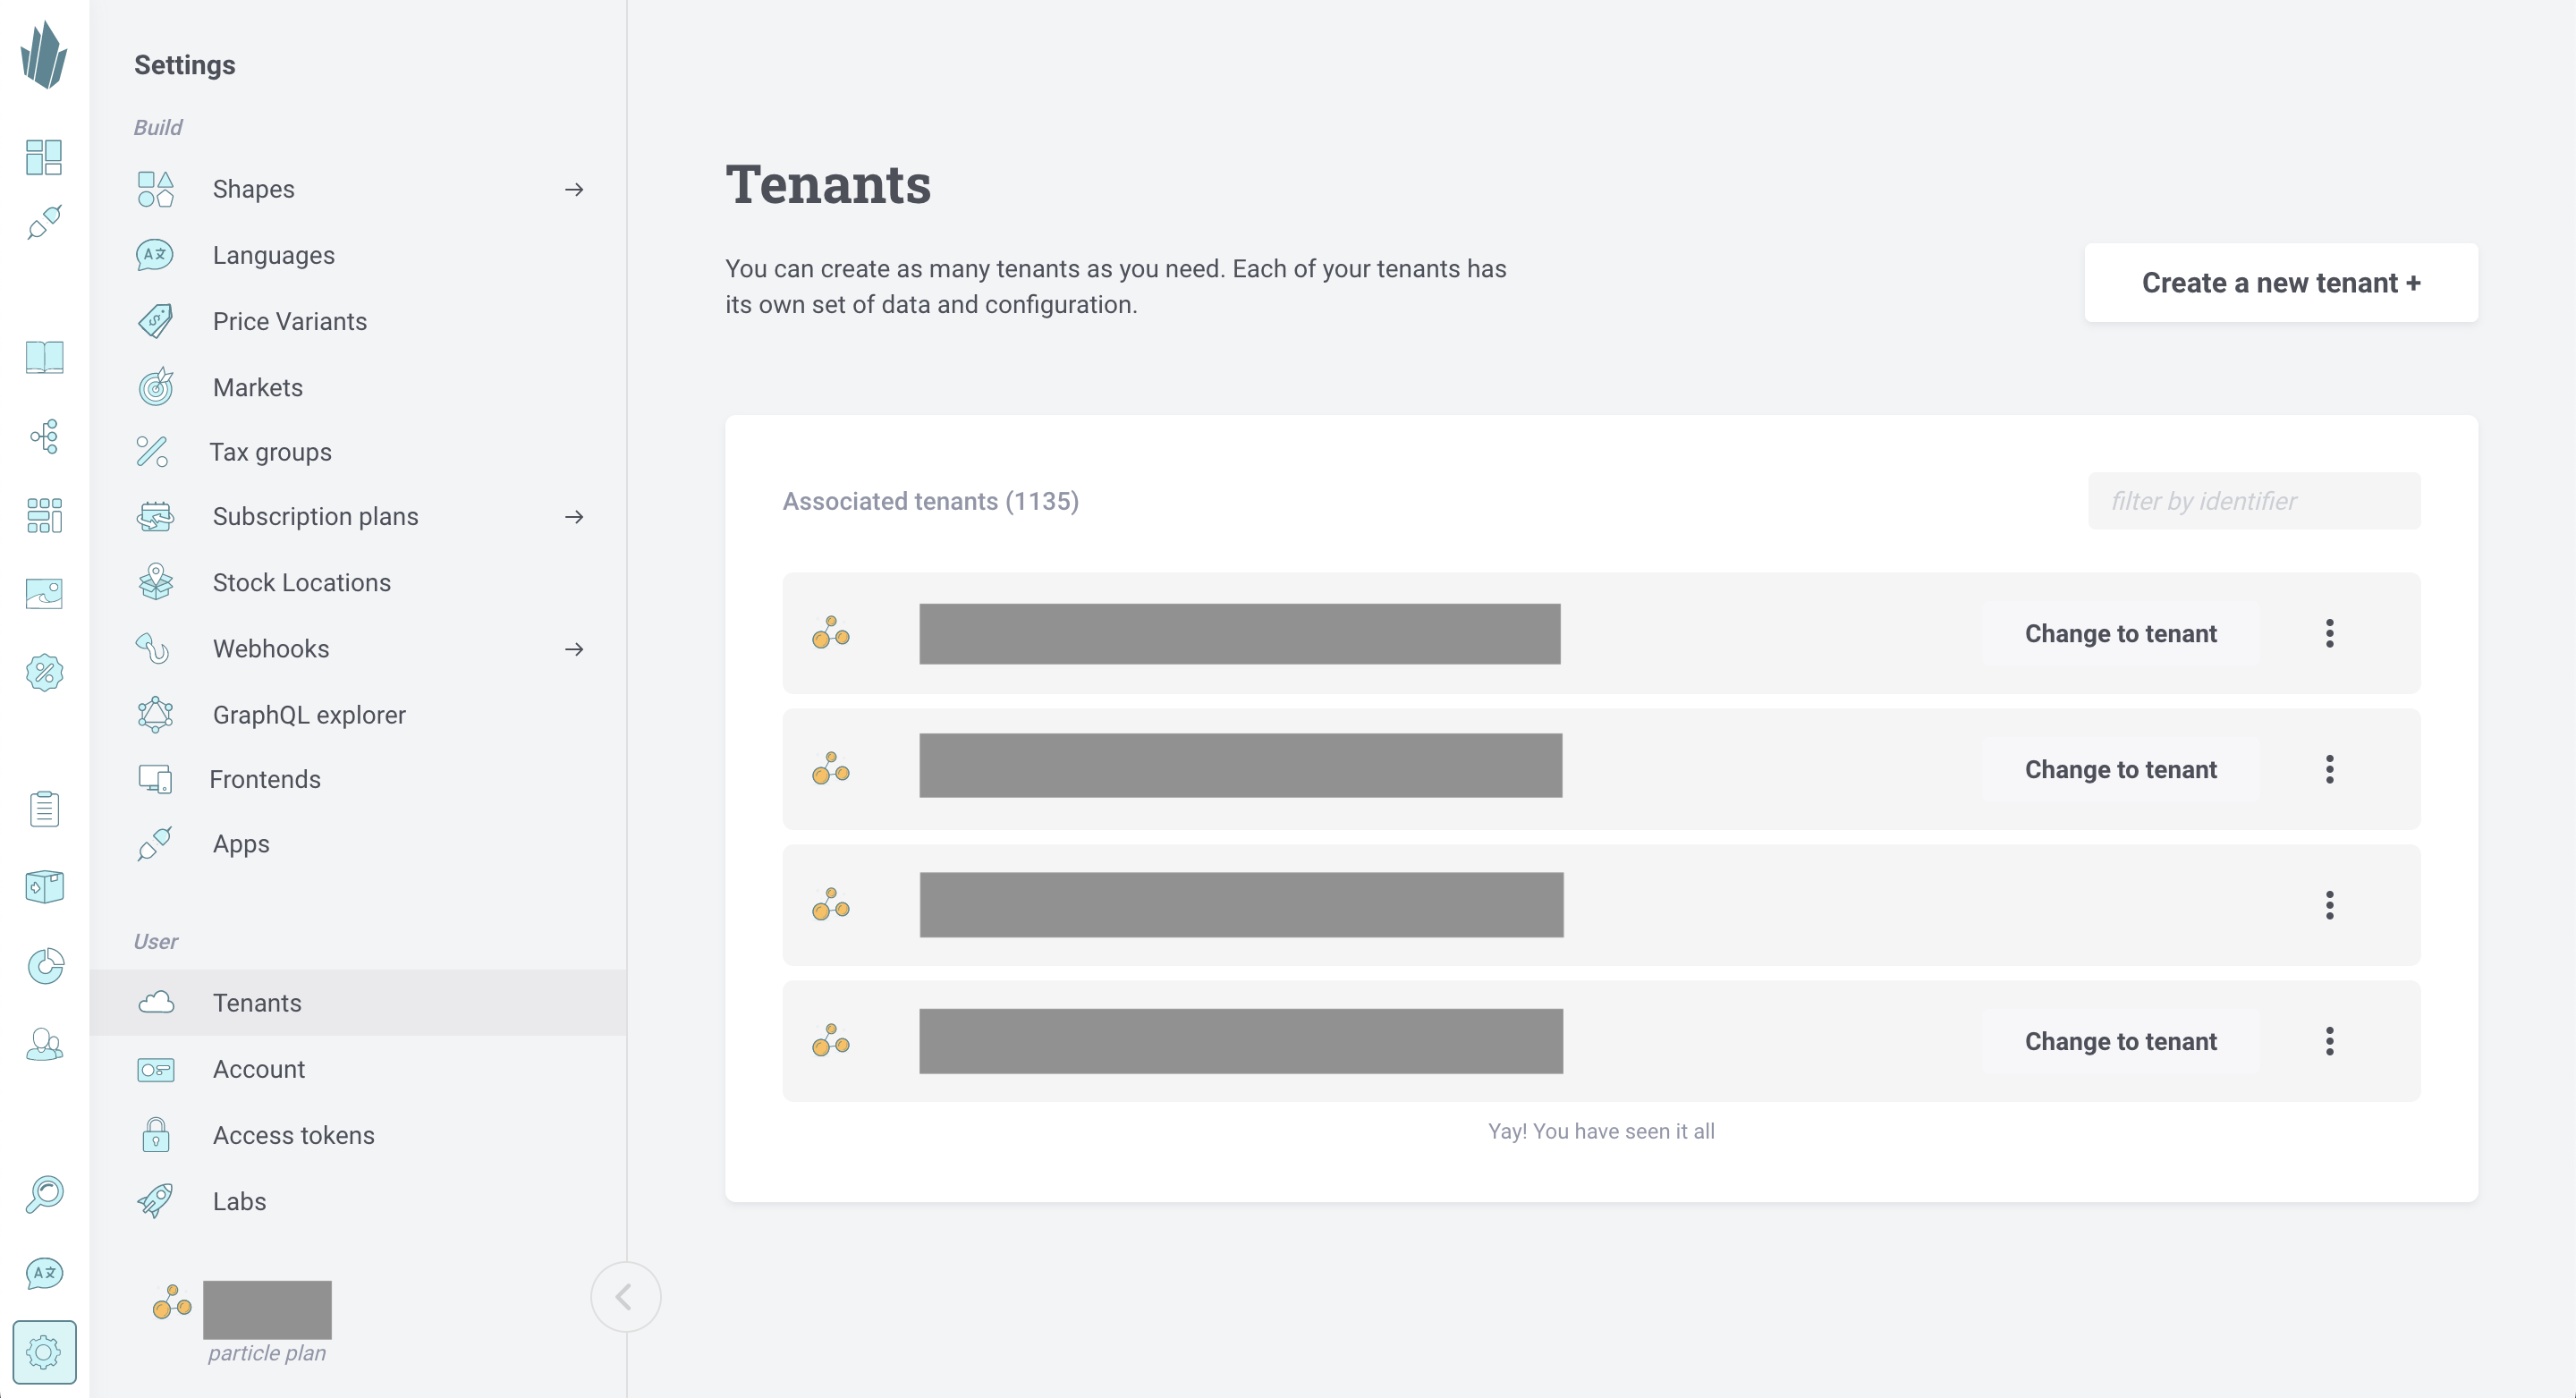
On the Tenants screen, you’ll see a list of all tenants you belong to.
- Search or filter to quickly find the right tenant.
- Click Change to tenant to switch your active workspace.
- Use the … (action menu) to leave a tenant you no longer need access to.
This view makes it easy to manage multiple tenants if you’re part of several projects or organizations.

Tenant Info
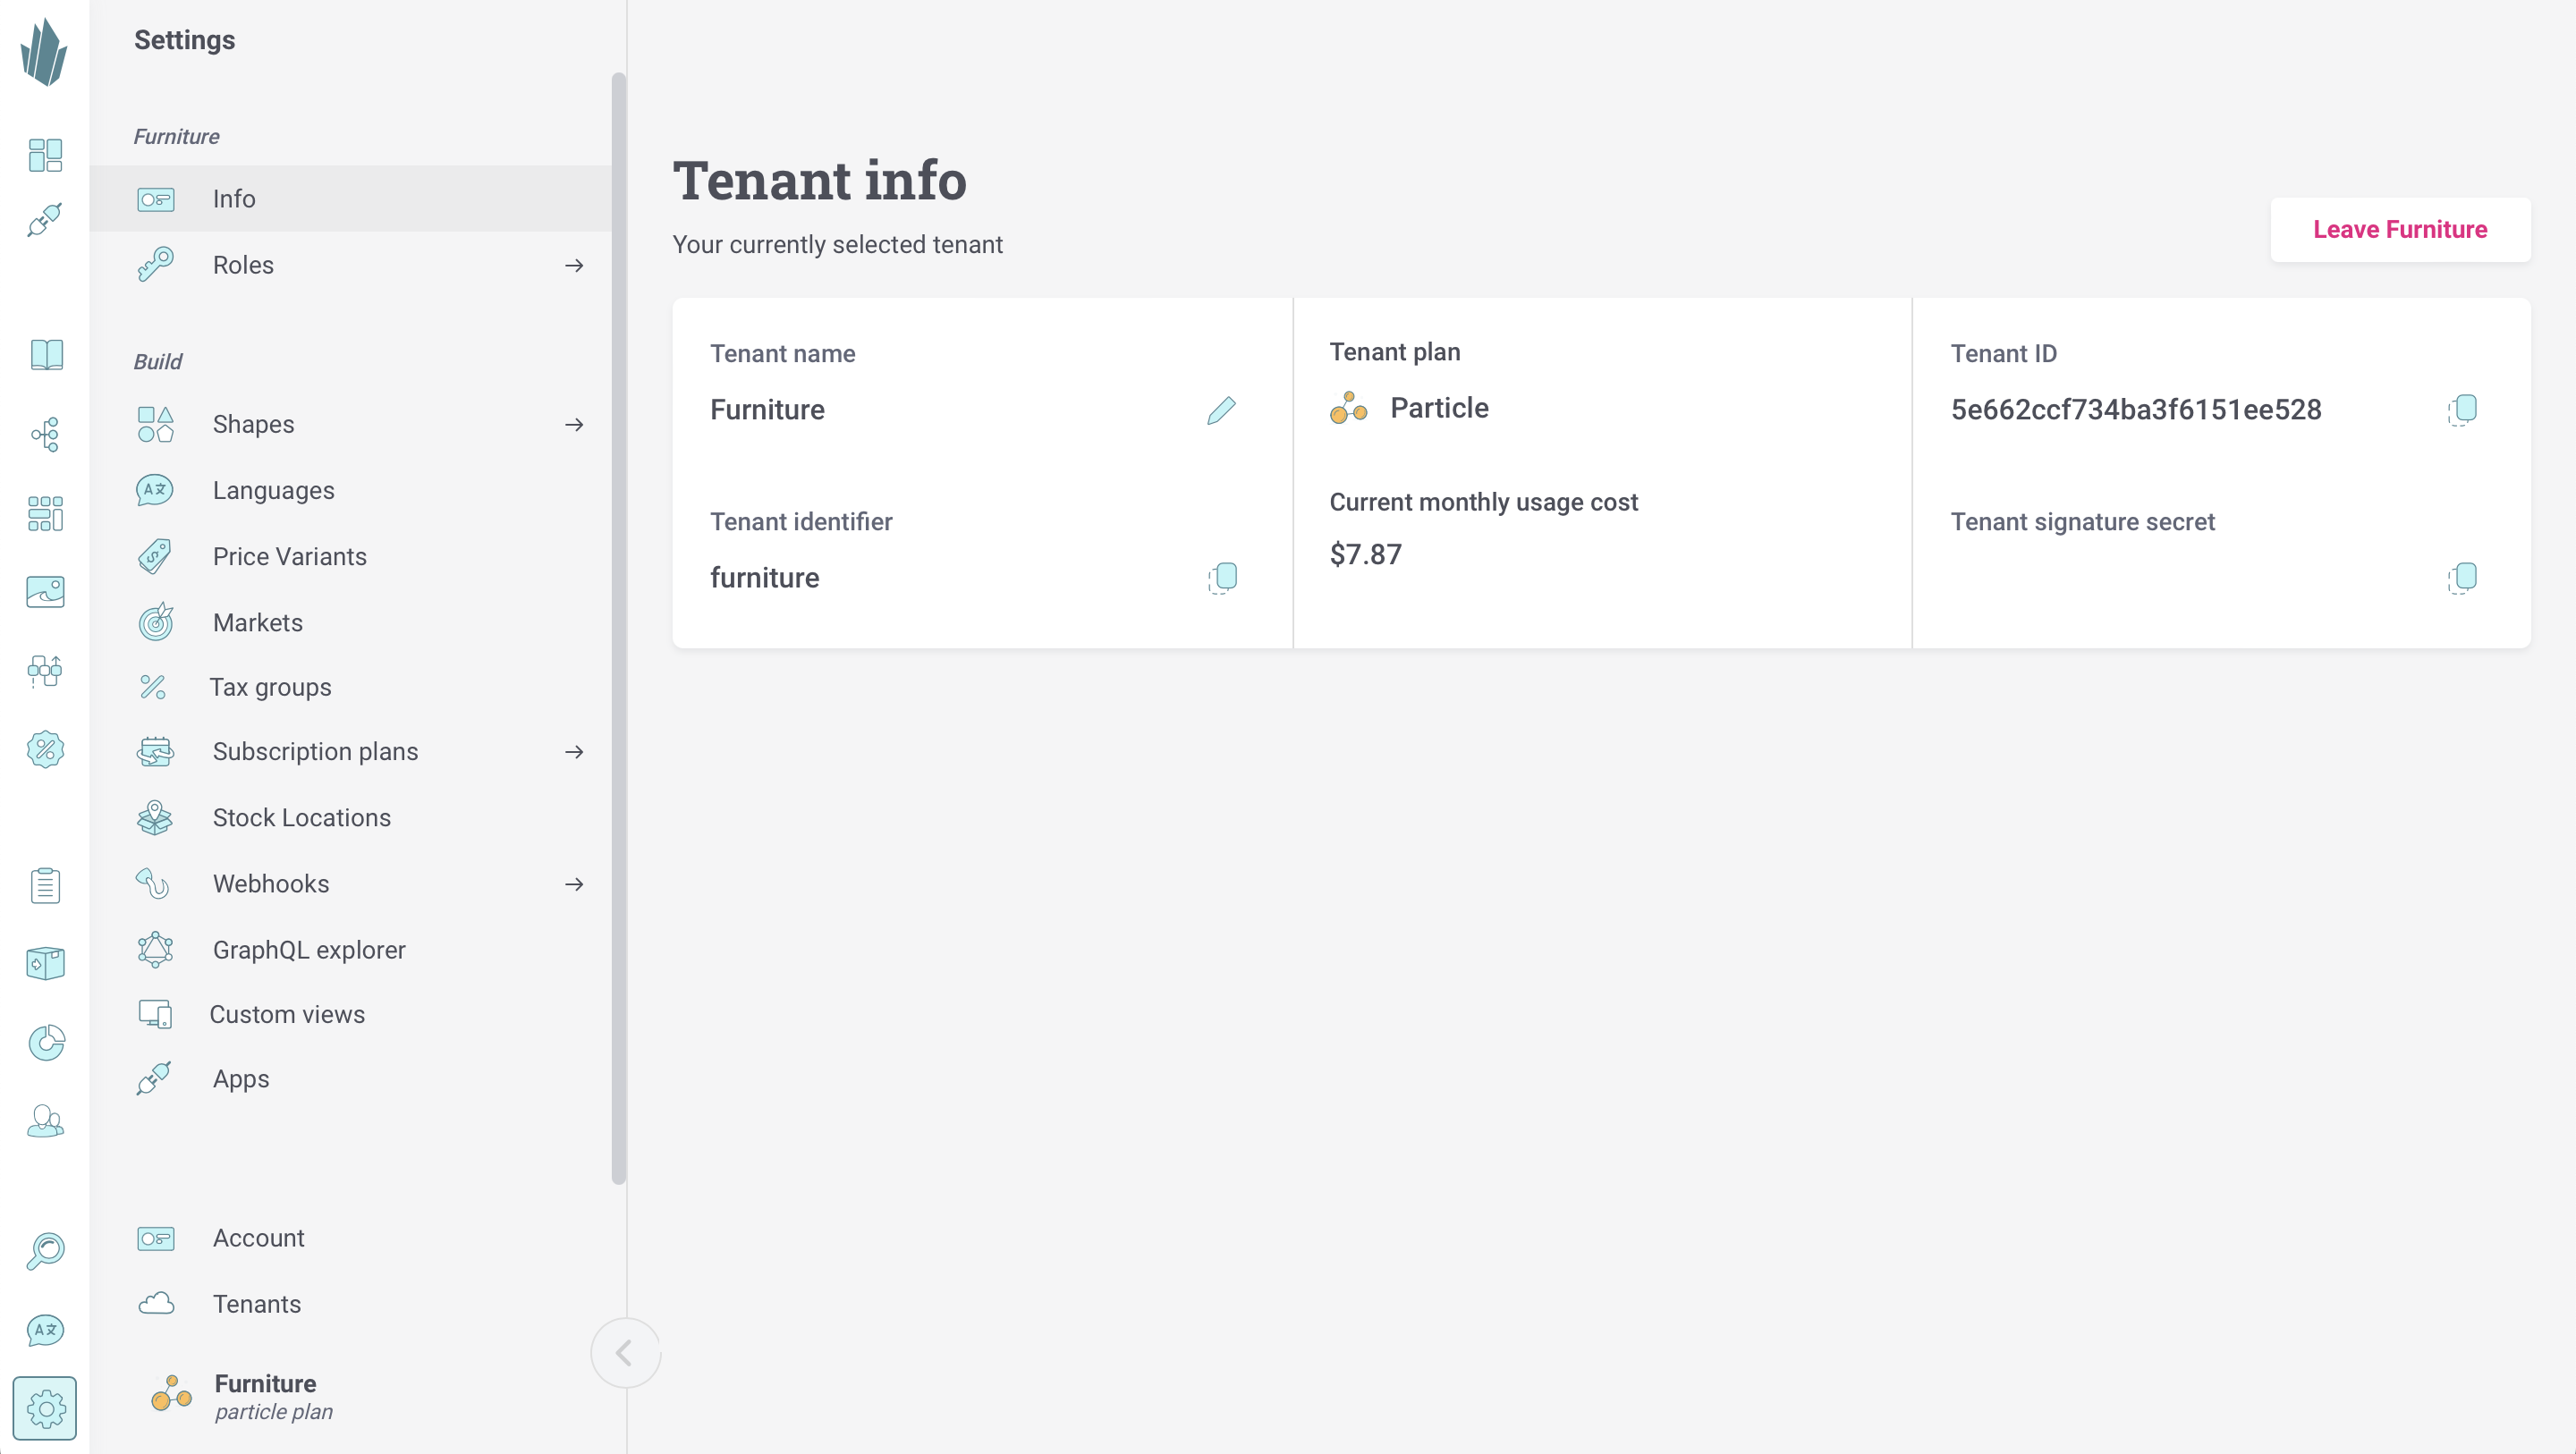
To view details about your current tenant:
- Go to Settings → Info.
- You’ll see:
- Tenant name
- Identifier
- Tenant ID
- Signature secret (visible only to Tenant Admins)
- Current plan and cost
You can edit the name or copy any value to your clipboard for use in integrations or code.
If you no longer wish to be part of this tenant, click Leave on the right-hand side.

Permissions
Only users with the Tenant Admin role can view or modify tenant-level settings, including the signature secret and billing details.
See Roles and Permissions for more information.
Leaving a tenant
The last user to leave a tenant is prompted if the tenant should be removed or not.
Keep exploring
Copying and Overriding Tenants
There are several reasons you might want to duplicate a tenant. You could back up a production environment, populate a staging or development tenant, or restore data from an earlier point in time. Crystallize lets you do this either programmatically via the Core API or directly in the App. This guide covers the steps in the Crystallize App.
Copy tenant requires a Crystal plan to be available.
Crystallize Access Tokens
Crystallize Access Tokens allow you to make API requests that require authentication, such as fetching and creating items via the Core API.