Data modeling with Shapes
Shapes in Crystallize are the blueprints that define how your content and products are structured. They act as templates, specifying which fields (components) should be available when editors create items in the catalogue.
By separating the definition (Shape) from the actual content (catalogue items), Shapes provide consistency, reusability, and flexibility across your entire product universe.
How Shapes Work
- A Shape is made up of components, the most atomic fields in Crystallize (text, numbers, media, relations, etc.).
- Components can be organized using structural components like Chunk, Choice, or Multiple Choice, giving you repeatability and polymorphic flexibility.
- Shapes can also embed Pieces, which are reusable sets of fields. Pieces allow you to avoid duplication and apply the same structured content model in multiple Shapes.
When an editor creates a product, folder, or document in the catalogue, the fields that appear are determined by the Shape chosen.
Types of Shapes
Crystallize provides three core shape types:
- Product Shape
Used to model products, including variants, pricing, stock, and attributes.
Example: A "Sneaker" shape with fields for size, color, material, and product images. - Document Shape
Used for editorial or marketing content.
Example: A "Blog Post" , “Landing page” or a simple “About us page” shape with fields for headline, rich text body, featured image, and author. - Folder Shape
Used to organize the catalogue and group related items. Folder shapes can be created in a hierarchy and make up the main structure of your product universe.
Example: A "Category" shape to group all “Shoes” products, or a "Campaign" folder for seasonal collections.
Why Shapes are Powerful
- Consistency: All products or documents created with a Shape follow the same structure, making your data reliable.
- Flexibility: Structural components let you model polymorphic or complex products (like a guitar vs an amplifier in the same Shape).
- Reusability: With Pieces and repeatable components, you can build once and apply across many use cases.
- Scalability: Whether you’re managing 100 products or 1 million, Shapes provide a predictable data structure that scales with your business.
Creating a Shape
To define a new Shape in Crystallize:
- Navigate to Shapes
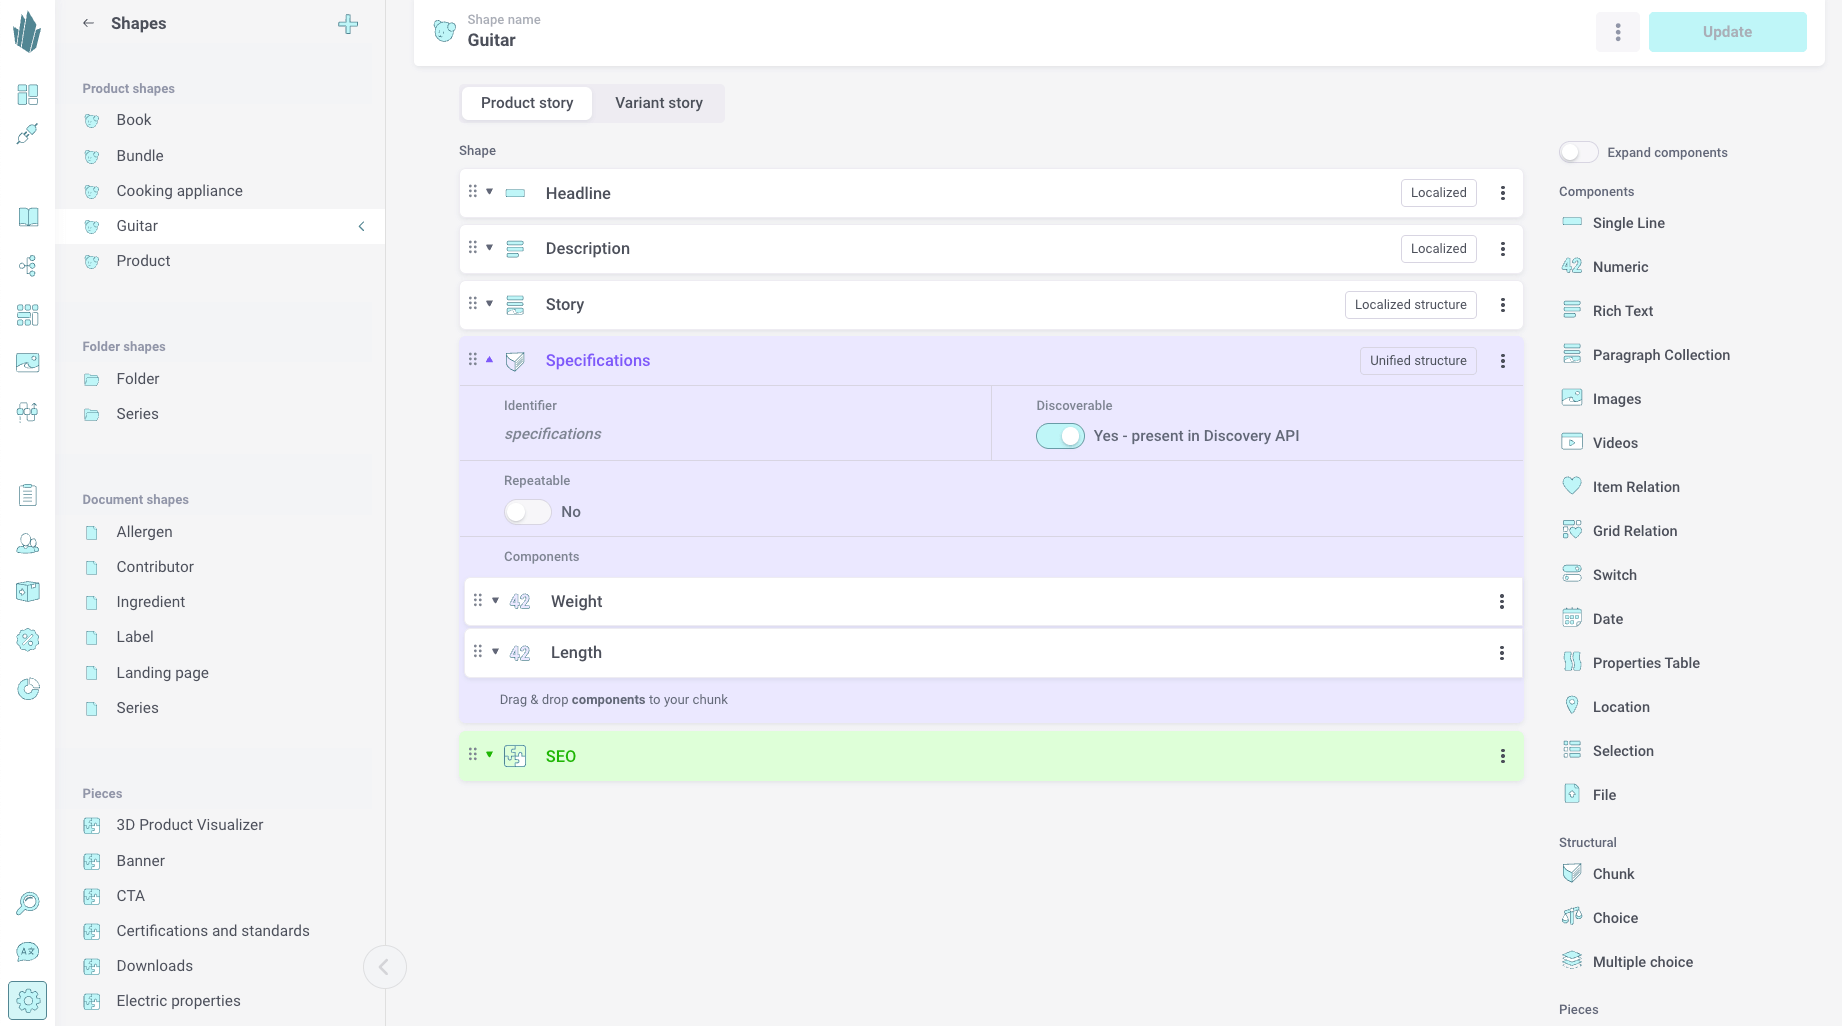
Go to Settings → Shapes in the left-hand menu. Here you can view all existing Shapes grouped under Product Shapes, Folder Shapes, and Document Shapes. - Add a New Shape
Click the + icon at the top to create a new Shape. Choose whether it should be a Product, Folder, or Document Shape depending on your use case. - Drag and Drop Components
From the right-hand panel, drag the desired components (e.g. Single Line, Numeric, Images) into your Shape. Arrange them in the order you want editors to fill them in. - Configure Component Settings
- Name: Give each component a clear name, such as “Headline,” “Weight,” or “Specifications.”
- Identifiers: Each field automatically gets a unique identifier (used in APIs), which can be customized.
- Localization: Enable localization if you want the field to support multiple languages.
- Discoverability: Choose whether a field should be included in the Discovery API.
- Repeatable: For components inside Chunks, you can allow repeatability (e.g. a list of ingredients or specifications).
- Use Structural Components
- Add Chunks to group related fields into repeatable sets (e.g. Weight + Length under Specifications).
- Use Choice or Multiple Choice if your Shape needs polymorphism (e.g. a Guitar could include either Electric Specs or Acoustic Specs).
- Embed Pieces
You can drag Pieces into a Shape to reuse predefined sets of fields like SEO metadata, banners, or product visualizers. - Save Your Shape
Once configured, click Update (or Save) to store your new Shape. It will now be available when creating items in the catalogue.

Creating a Piece
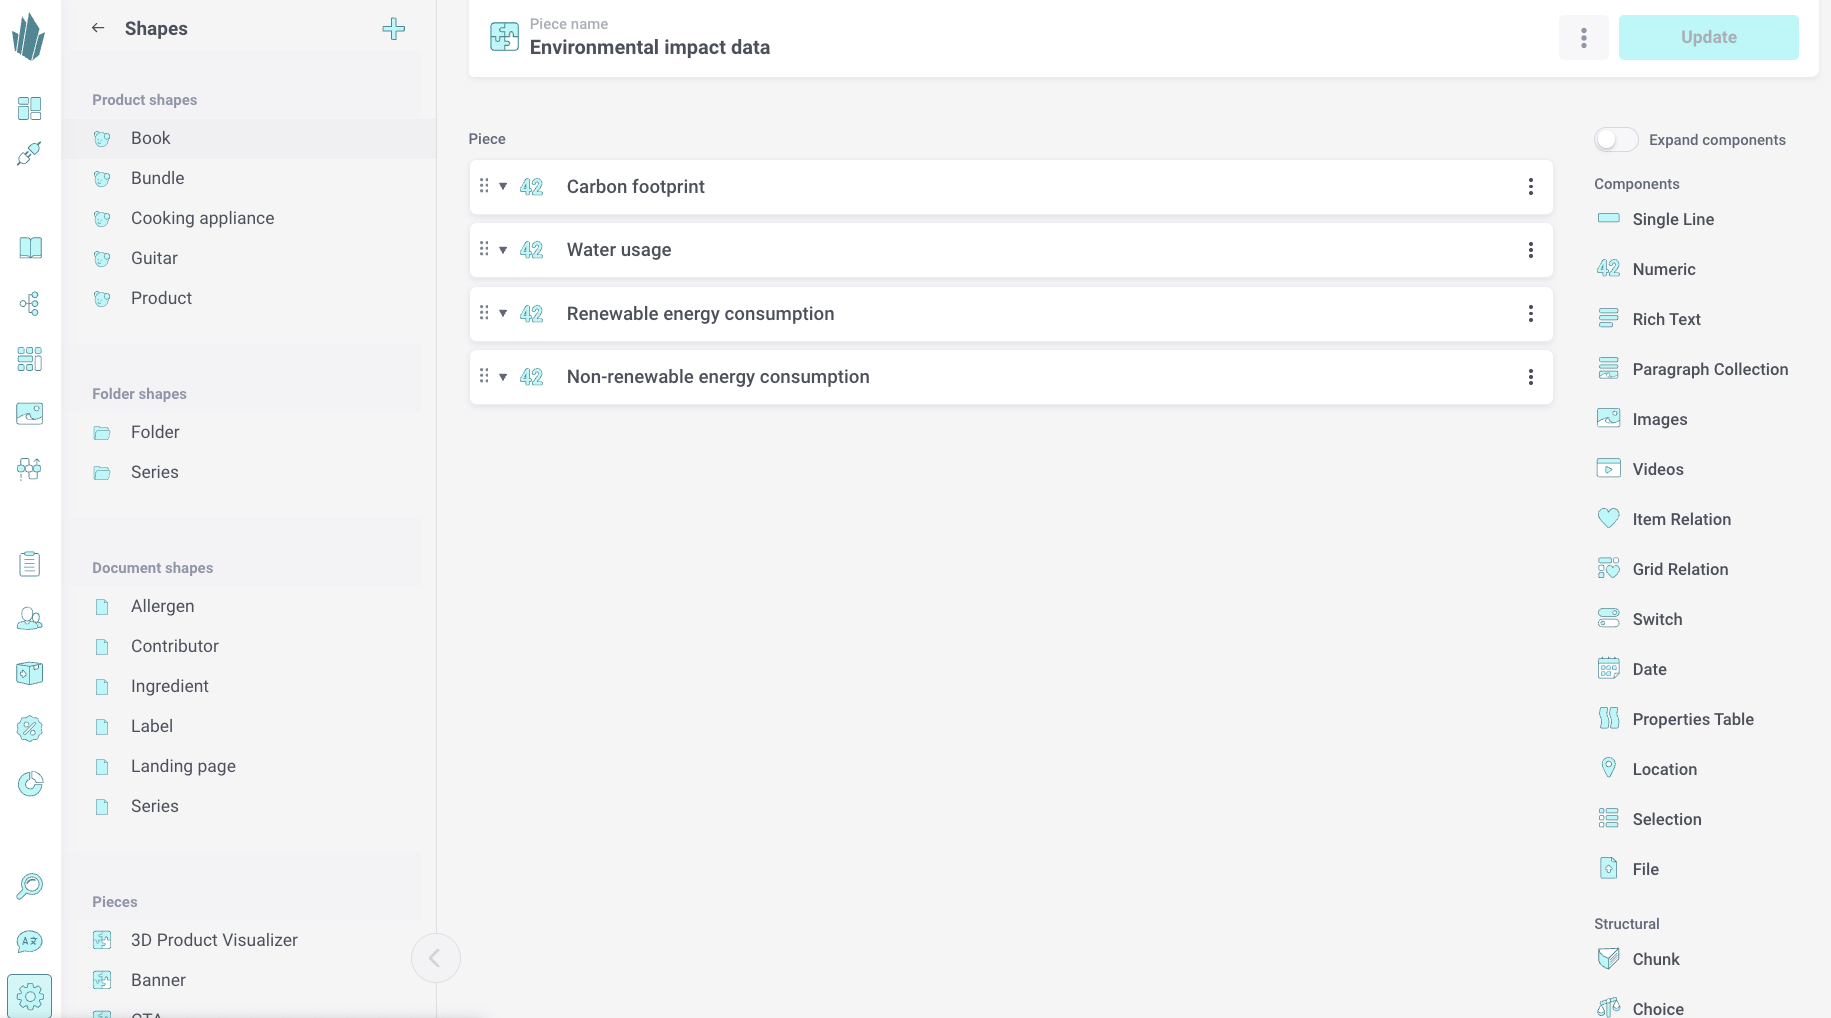
Pieces in Crystallize are reusable sets of fields that can be embedded inside Shapes. They are ideal for modeling content that you want to reuse across products, documents, or folders - for example SEO data, environmental impact information, or marketing banners.
Steps to Create a Piece
- Navigate to Pieces
Go to Settings → Shapes and scroll down to the Pieces section. - Add a New Piece
Click the + icon to create a new Piece. Give it a clear name that describes its purpose (e.g. “SEO Metadata,” “Environmental Impact Data,” “Banner”). - Add Components
From the right-hand panel, drag and drop the components you need. - Add simple fields like Single Line or Numeric.
- Add structured content like Chunks for repeatable values.
- Use relations (Item Relation, Grid Relation) if the piece needs to connect to other catalogue items.
- Configure Each Component
- Name & Identifier: Provide a descriptive name (e.g. “Carbon footprint”) and check the identifier if you want to adjust it for API usage.
- Localization: Enable localization if the content needs to be translated into multiple languages.
- Repeatable: For components inside Chunks, enable repeatability when you want multiple entries (e.g. list of sustainability metrics).
- Save the Piece
Once configured, click Update to save your Piece. It is now available to be embedded into any Shape.

Watch the livestreams on data modeling
Keep exploring
Data Modeling Design Patterns
Data modeling design patterns provide guidance on how to structure product information in a way that is consistent, scalable and easy to maintain across large or evolving catalogues. These patterns help teams make deliberate choices about how data is shaped, how meaning is shared, and how content is reused across products, markets and channels.
This collection focuses on practical patterns that can be applied when building product experiences in Crystallize. Each pattern includes an explanation of when it is useful, how it is structured, and considerations to be aware of when applying it. The goal is not to prescribe one correct model, but to provide clear mental models and reusable approaches that help improve clarity, flexibility and long-term maintainability.
The design patterns are intended for both technical and non-technical roles involved in shaping product information, including product managers, developers, content editors and architects.
Multilingual
Crystallize supports multilingual content throughout your Product Universe, making it simple to manage product data and storytelling for multiple markets.