Managing Price Lists
Let’s say you want to run a special sale in a particular geographic region, or ensure your preferred clients can buy from you at a discounted rate. How do you adjust the right product prices at the right times, for the right groups of people? With Crystallize, you can set up price lists to handle price adjustments automatically for the products, timeframes, and markets you want.
Price lists are fixed price adjustments, permanent or temporary, that apply to one or more markets. Since they’re associated with product variants in your tenant’s catalogue, the adjusted prices would be displayed in those markets while browsing the products on an eCommerce website. Price lists can be managed programmatically with the PIM API. You can query price list information using the Catalogue API.
You’ll need to define at least one market before you can create a price list. Read more about creating markets here.
To manage price lists with the Crystallize App, click the Special Prices button on the left-hand side of the screen. From here, you can either click the plus sign button (+) at the top of the screen and choose Price List, or click the Create price list + button in the center of the screen, to start defining a new price list.
Here’s what you’ll need to specify for a new price list:
- Name. At the top of the screen, type in a name for the price list.
- Identifier. A unique identifier that you’ll use to reference the price list programmatically. It’s auto-generated based on the provided name, but you can change it.
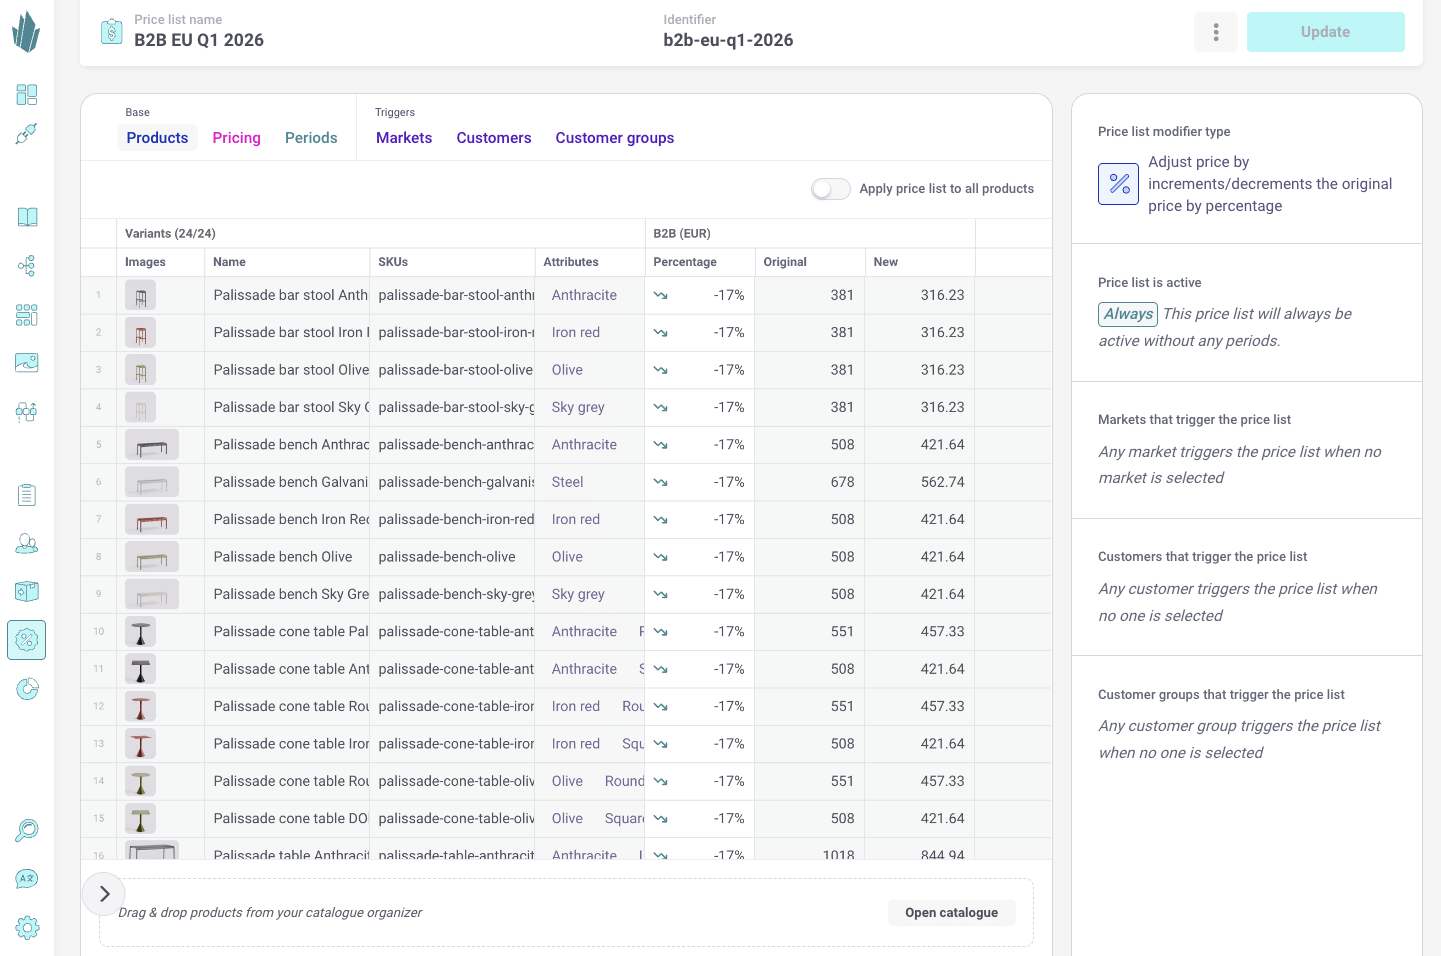
- Affected SKU(s). If you want this price list to apply only to a specific list of product variants, you’ll need to add those variants to the price list. Click the Open catalogue button, or click the catalogue icon in the row of icons at the top of the left-hand panel. This opens your catalogue for browsing. Drag and drop desired products into the Affected SKUs list, then select the precise product variants you wish to add. To delete a product variant from the list, click the checkbox next to it, then click the Remove selected button.
- Start and End Date/Time (optional). You may specify a start and end date/time for when the adjustment should take effect. If no date/time is specified, the adjustment will go into effect immediately and will always be active.
- Discount Everything. Enable the Apply price list to all products switch if you want the price list to apply to every product in your catalogue. Otherwise, leave it disabled.
- Target Markets. Leave the Use price list for all markets switch enabled if you want the price adjustment to apply to all of your markets. Otherwise, disable it and select only those markets that should receive the adjustment. The price list must apply to at least one market.
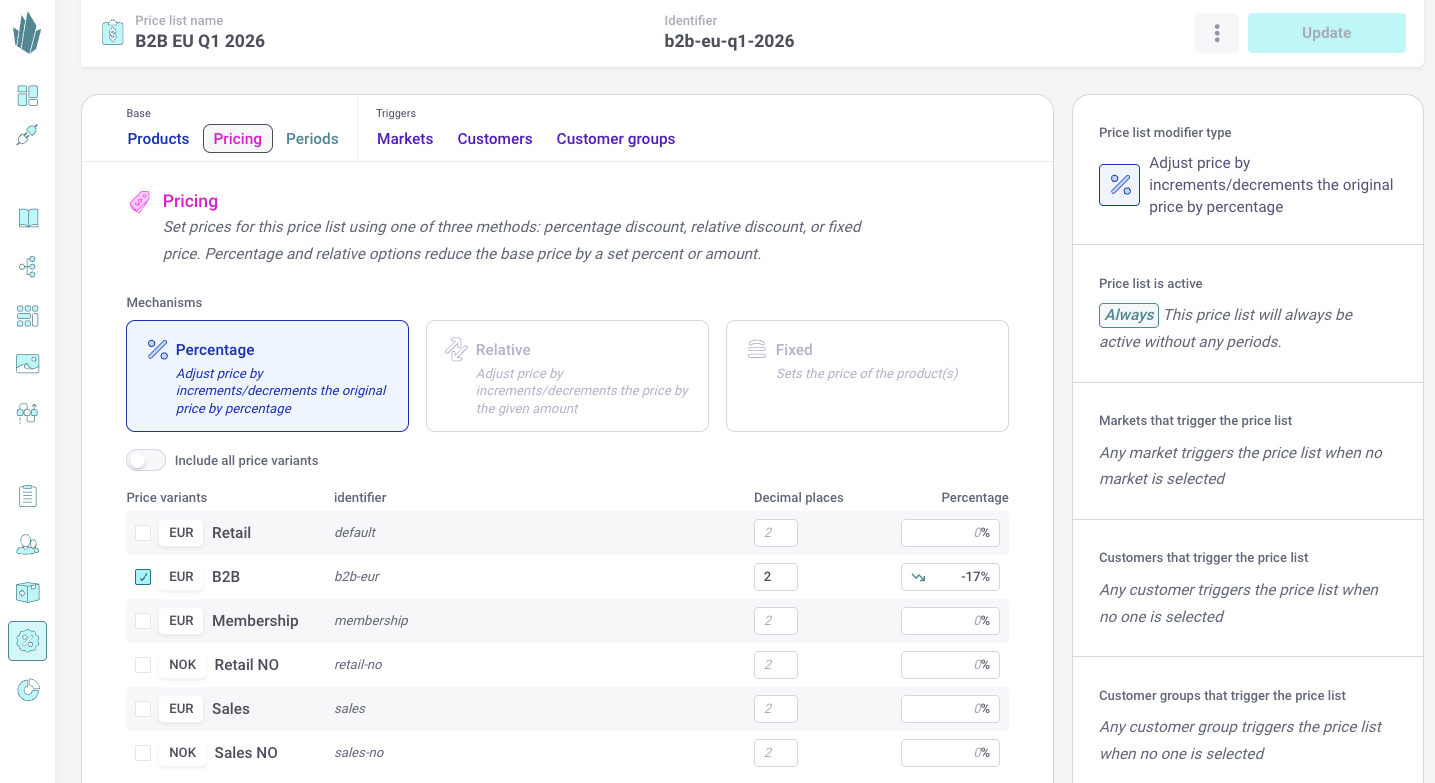
- Price variants. There are 3 price adjustment types to choose from: Percentage (specify a percentage to raise/lower each price), Relative (specify a value that will be added/subtracted from each price), and Absolute (specify a value that will become the new price for every affected product). All of the price variants that you’ve defined for this tenant will be listed here. Click the checkbox beside each price variant you want to adjust and specify what the adjustment should be, using the Decrease by/Increase by drop-down menu to set a positive or negative adjustment. Next to the adjustment, you can specify the decimal point precision that the calculation should have.
Once you have some price lists and markets defined, the Special Prices screen will begin to display a timeline showing current and future price adjustments.
Price lists are added to products at the product variant level. The product variant must have at least one price variant associated with it in order to be added to a price list. You can add product variant SKUs to a price list programmatically with the PIM API. Within the Crystallize App, there are three ways to do it. The first method is described above, which is to add them from the Special Prices screen.
The second method is possible while using a product’s Nerdy View. You can select one or more product variants, then use the Add to price list drop-down menu to choose an active price list. Make sure to save the spreadsheet and publish the changes.
Third, you can browse to a folder full of products and choose Nerdy View from the View drop-down menu, if it’s not already selected. Click on the Variants tab, then select one or more variants by clicking on their row numbers. You can [Shift] + Click or click and drag to select multiple items in a row, or [CTRL or ⌘] + Click to select more than one that aren’t adjacent. Once the items have been selected, click the plus sign button (+) next to the Add to price list label that appears at the bottom of the screen. Type the name(s) or click on the price lists(s) you want to assign, then click the Add to price list button. To preserve your changes without making them publicly available yet, click the Save Changes button in the top right of the screen. To save changes and immediately make them public, click the Save and Publish button.
Once product variants have been added to a price list, you’ll see a list of these variants when you return to the Special Prices screen and view the price list. You can make manual adjustments to discounts/prices, and remove variants using the Remove selected button. Again, make sure to save any changes.
Once a price list has been created, it will be listed on the left side of the Special Prices screen. You can click on an existing price list to review/edit its constraints as needed. To delete a price list, click the action button (...) at the top of the editing screen and choose Delete.
You can (optionally) set up webhooks to subscribe to price list-related events. In Crystallize, events are fired whenever price lists are
- Created
- Updated
- Deleted
You can set up a webhook, then come up with your own way of responding to events. For more information, read about defining webhooks here.