Products
Pretty view gives you a content-first editing experience. It’s built for marketers, copywriters, and merchandisers who need a simple and visual way to work with catalogue items. Products, Documents and Folders can all be edited in pretty view.
You can edit products in two ways:
- Pretty View offers a content-first, visual editing experience. It’s ideal for marketers, copywriters, and merchandisers who want to build rich product stories and manage components visually.
- Nerdy View presents your product data in a spreadsheet-like layout, perfect for batch editing product variants and structured attributes efficiently.
What is a Product?
A product represents a sellable item in your catalogue. It can be a standalone product or one with multiple variants such as different sizes, colors, or bundles.
Products include components on the item level for storytelling, specifications, and other contextual data. Each variant also has its own components that define detailed commerce information.
Every variant automatically includes core commerce fields in addition to the components defined by the shape on product and/or product variant level:
- Variant name
- Images
- SKU
- Stock per location
- Price per price variant
- Attributes
Pretty View: Product Storytelling Made Simple
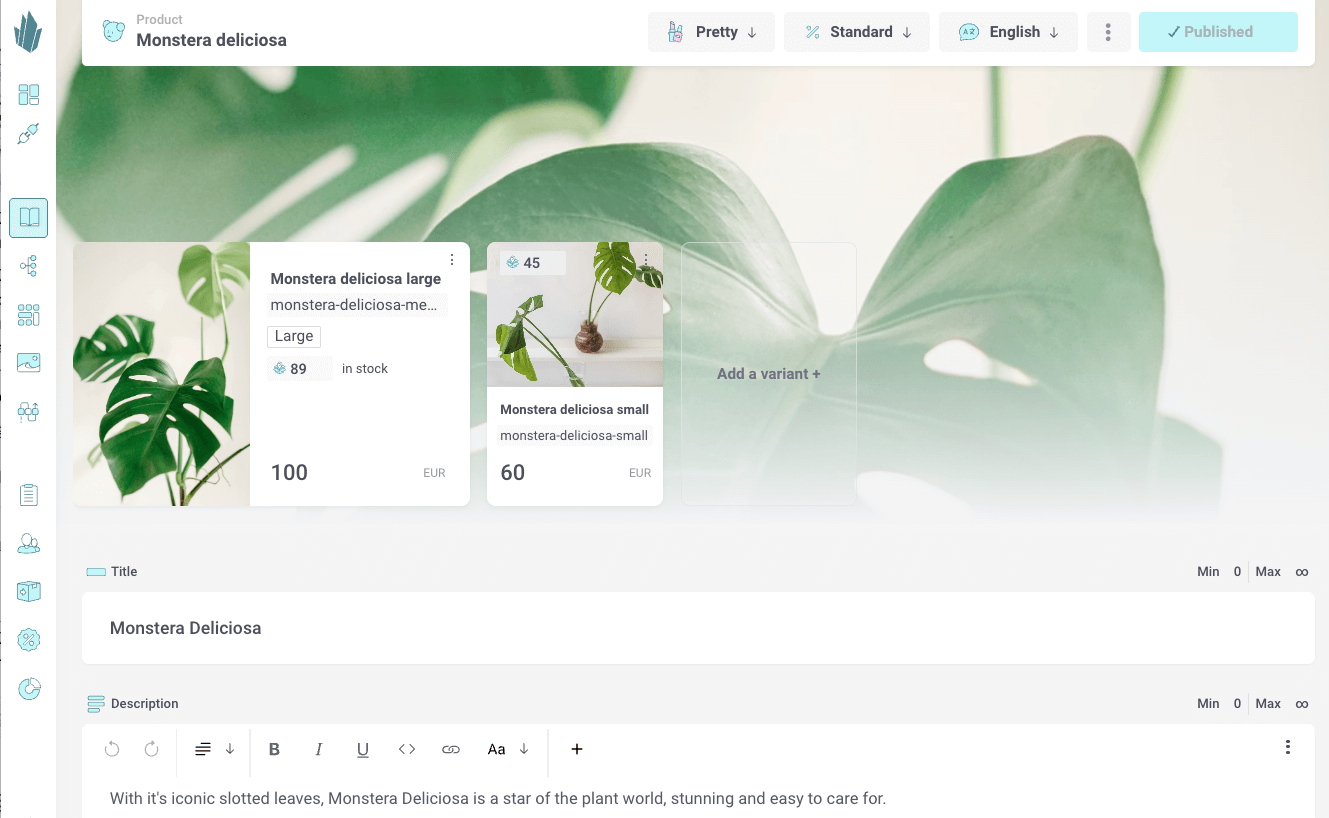
Pretty View shows your products with all components defined at the product level, such as description, dimensions, related products, and brand. It lets you see how content fits together and make quick edits to text and media without touching any technical details.
Use Pretty View when you want to:
- Focus on storytelling and presentation
- Get a clear visual overview of your content
- Work efficiently with product variants, descriptions, and media assets
- Switch between languages and edit localized content side by side
Pretty View makes rich product storytelling simple. It helps you keep your catalogue both accurate and engaging.
Creating a new Product
To add new content to your catalogue, click the Create+ button in the left-hand navigation.
- First, choose the Product type of item.
- Next, you’ll see a list of available Product shapes. Shapes act as blueprints, defining the components and structure of the item.
- Select a shape, give your item a name, and you’re ready to start adding content.
Pretty view makes this process straightforward, so you can go from an idea to a structured item in just a few clicks.

Drafts and publishing
Crystallize automatically saves your work as a draft while you edit your product and product variants, so there’s no need to hit “Save” manually.
To make your changes available publicly in the Catalogue and Discovery API, you’ll need to click Publish.
From the three-dot menu on each item, you can:
- Send to flow for approval or scheduled publishing
- Unpublish to remove an item from the API while keeping it editable
- Publish all languages if your item is multilingual
- Duplicate the item
- Delete the item
Language Switching
If your catalogue is multilingual, you can easily switch between languages in Pretty view. Use the top menu bar to select the language you want to edit. This makes it simple to manage localized content side by side.
Pretty view is the best option when your priority is rich product storytelling and fast editorial work, with publishing controls always just a click away.
Keep exploring
Folders
Folders are containers that organize your Product Universe. They share the same structure as documents but can be nested to build hierarchies and relationships between products, content, and categories.
You can edit folders in Pretty View for visual storytelling and merchandising, or in Nerdy View when you need to batch edit content or manage multiple items at once.
Product Variants
Product variants represent different versions of the same product, such as color, size, or bundle type. Variants are published together with the main product and can be edited in both Pretty View and Nerdy View.
Each variant includes system-defined attributes like images, videos, price variants, and stock per location. You can also add optional components at the variant level for details such as material, technical specs, or product-specific media.